Showing posts with label Projects. Show all posts

Monday, March 23, 2009

Toting A Design

Look at the beauty that
I've been enjoying all weekend!

A local grocery store sells these wonderful cardboard totes. It's their effort to reduce the use of plastic grocery bags. When I saw them I knew they would be coming home with me. I planned to use them for something other than my groceries. I thought they would make fabulous organizing/storage containers. I've always loved a good cardboard box! There was only one problem, how to hide the store's logo.A little bit of pretty wrapping paper and some spray adhesive and now they look like a designer tote with a price tag of less than $1.50 each!
I must tell you a funny, yet humbling story. After taking the picture of this stack of totes, I left them sitting in my living room. You've read my blog so you have a good idea of what my living room looks like. I have layers of decorations! Yesterday my son had some friends from Russia come to visit. They sat there in a room filled with totes stacked neatly and collections and displays galore. After a while one of them asked my son, "Do you live in a store?" He chuckled and said, "No, my mom just likes to collect a lot of stuff."
Needless to say, I took time to appreciate and reflect upon my abundance, of not just decorations, but of home, freedom, and blessings.

Thursday, March 19, 2009

Weekend Plans

I've got some wonderful plans for this weekend.
No, it doesn't involve a trip to Paris----
although wouldn't that be divine!
I do think that I may put on a little French music
while we add a little of this
to this.And while I do a bit of this.Then I will be using these to finish it off.What are your weekend plans?

Tuesday, February 24, 2009

It's Been Sacked

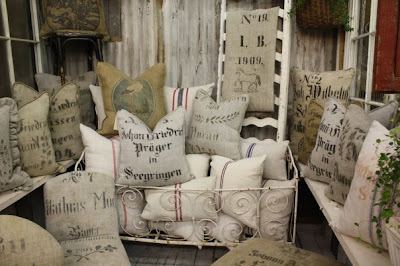
Antique grain sacks are so popular right now.
I decided to make my own version
using burlap and paint.
I personalized it to my family.
2 parents+5 kids=No.7
(Name has been covered to protect the innocent)
Our last name has Swiss origins,
so the word "family" is spelled the Swiss way.
I used spray adhesive to stick it
right on top of the old painting.

How's that for a change of scenery?
It looks much better than it did here.

Monday, February 23, 2009

The Fill In

Remember when I added an extra frame around my foyer mirror? Well, that left an empty spot in my decor where that frame had previously been. There was only one thing to do. Find a fill in. This is what I found.Of course, the frame was a little too gold for my taste, so I brought out the Rub 'n Buff to grunge it up.


After applying R 'n B, I gave it a good rubbing which revealed a little of the original gold. This gave the finish more depth and dimension. I think it now has the appearance of an old piece that's been found in an attic. I like it much better now.
I'm sure you're wondering if
I plan on keeping that nice painting.

No.
I am not.

I have other plans.
But that will be another post.

How's that for a tease?

Friday, February 20, 2009

Hang It Up

My daughter has a HUGE collection of jewelry. She's already filled up the jewelry frame I made. For Christmas she received so many necklaces that I told her that I would make her a necklace holder. Almost two months later, I finally decided to cross that project off my list. Here's how I made it.
First, I found some pretty fabric.
I took out the mod podge and picked out some drawer knobs while hubby cut a board to size and drilled holes to fit the screws for the knobs.I painted the board black. When it was dry I placed it on top of the upside-down fabric and traced around the board. I cut out the fabric. I brushed mod podge onto the board and applied the fabric piece.Then I brushed a layer of mod podge on top of the fabric in one direction. When dry, I brushed on another layer in the opposite direction.Lastly, I poked holes in the fabric to screw on the drawer knobs, then added the hanging hardware.And there you have it! A pretty necklace holder, or towel holder, or apron holder, or whatever-you-choose holder.

Wednesday, February 18, 2009

Plan B

PLAN A:
*Take eight dollar thrift store table
out of storage.

*Sand off ugly gold paint to
reveal original mahogany finish
(this should be easy since the previous owner
didn't properly prep table before spray painting)
.
*Leave just enough gold paint patches
to give the table an "old world" finish.

*Pair table with old mirror.PROBLEM:
*Removal of gold paint reveals
several scratches on tabletop
(likely a reason the previous owner painted it).


PLAN B:
*Sand tabletop to remove scratches.
*Tape off mirror and molding.
*Lightly sand mirror frame.

*Break out the, ever dependable, black spray paint.When doing makeovers,
it's good to have a Plan B.

Friday, February 13, 2009

To Top It Off

The guest room needed two bedside tables. I like having mismatched tables, especially if they have character. I had the pedestal part of a table stored in my garage. I can't even remember what happened to the original top. I just know that, much to my husband's dismay, I had kept the bottom as a project-in-waiting. All it needed was a pre-cut round top and a little paint.After giving it a couple of coats of paint, I wasn't happy with the overall look. It just called out for a little something extra.
I ran to the fabric store and found some trim and some heavy weight fabric that has a great texture---like a combination of burlap and linen.I turned the table upside-down on the fabric and traced
and cut about an inch wider than the tabletop.I sprayed a generous amount of adhesive
to the tabletop and applied the fabric,
pulling and gluing the extra fabric along the edge.
I used hot glue to adhere the trim
along the center of the edge.
(click on photo to enlarge)
I love the look of this table!

It adds such texture and beauty to the room.

Friday, January 16, 2009

Dollar Notes

Look at what I bought at the dollar store.With a little chalkboard paint and a new ribbon,I have a fun way to remind the boys
in my house that they have a chore to do.

Tuesday, November 25, 2008

Words of Advice

My son needs a chair for the desk I'll be painting.
I found this one.
I like it because it's very sturdy and
will hold up to the things that boys do to chairs.
(My boys like to do a balancing act
on only the back legs.)

I spray painted it black, of course,
but I couldn't stop there.
One of the great things about blogging
is that it challenges me to add
one more step to my projects.
I pulled out my silver paint pen
and outlined the chairs details.
I sanded it to give it a head start on the distressing
that it will naturally occur in my son's room.
It still didn't look finished.
That little flat bracing challenged me to do a little more.
Keeping in mind that my son is now twelve
and whatever I do, it will have to last from "tween" years
through, possibly, young adulthood.
I chose to write some words of advice.
Then I softened the writing by sanding it
with a fine grit paper.
I'm pretty pleased with the final look.
I hope my son will like it too!

Monday, November 17, 2008

An After After

Okay, I'm warning you now, in the last little while I have managed to purchase TWO cases of black spray paint, so I will likely be posting a weeks worth of "I spray painted this black" projects. I'm giving you the opportunity now to abandon reading my blog for a week. However, if you choose to stick around, I will try to make things a bit interesting.
Today we're going to start out small.
I love botanical prints. I felt pretty lucky when I found these two at the thrift store. Technically, you are looking at an "after" picture of them. Originally the frames were gold. I like them much better in black. But, the frames are thin and I really like nice wide frames.I found some frames for two dollars a piece. They must have come from a historical building because they all had old photos with the dates. I took the frames apart and painted the frames and the mat boards. When everything was dry, I placed the prints inside the newly painted frames. I like the look of the "after-after" much better.I thought you might enjoy a close up of one of the original photos. It's a picture of a grocery store in 1910 during Thanksgiving. Seeing this, made me very thankful that when I purchase my Thanksgiving turkey this year, it will be wrapped in a protective plastic, not hanging upside-down from a wooden beam.
Yes, one more convenience in life to be grateful for!

Tuesday, November 11, 2008

A Simple Setting

I thought I'd make up a simple Thanksgiving table setting with things you may already have in your home. Of course, it's always good to start with a pretty white plate. I love white plates! They are so versatile. Next comes a clear glass plate. These are very inexpensive and look great paired with the white. For a seasonal flair, cut leaf shapes out of cardstock. You can use ready made die cuts, copy one off your computer, or do what I did, and just trace around a leaf. I painted the cardstock leaves with metallic rich caramel spray paint. Once dry, I used a silver permanent marker to write a name on one leaf, and placed it on the napkin. The napkin ring is made from a vine from my yard. I sprayed adhesive on the other leaf shape and stuck it on the bottom of the glass plate. The possibilities for this plate decoration are endless. Cake die cuts could be used for a birthday, hearts for Valentine's, pumpkins for Halloween. Now do you see why clear glass plates are great?I used burlap as a runner/place mat, and slipped a votive into a hollowed out little pumpkin, and the centerpiece is a handmade gratitude tree.

If you want something a little more fancy for your centerpiece, place double-sided tape on candles and then roll them in split peas. I got the idea here.
My tip: use clear tape, or do what I did and roll the candles in glitter to cover the tape and fill in the spaces where the peas didn't stick.
It's just that easy to make
an elegantly simple place setting.